
How do I add a new user to the CMS? How do I assign roles?
If you are a Staff Manager, you are responsible for assigning roles to yourself and other people in your office or department according to the workflow process your team decided on. If you haven't done so already, we strongly suggest you read through the following articles before assigning roles.
Important Notes:
- Within any subsite, only a Staff Manager (or "staffer") can add users and assign roles.
- Before a new user can be added to a subsite, their NetID must be activated for use in the WebCMS.
- To assign someone the Staff Site role or to remove a Staff Manager, you must contact the Web Development Group.
- The following tutorial will guide you through assigning roles at the top-level of your subsite. You may also assign roles at the folder-level by navigating to the specific folder (or orgfolder), clicking on the Sharing tab, then following steps 3-10 below.
Once you're ready to begin assigning roles, follow the steps outlined below:
- From your subsite's homepage, click on the Contents tab.
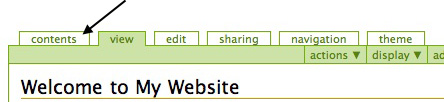
- Click on the Sharing tab.

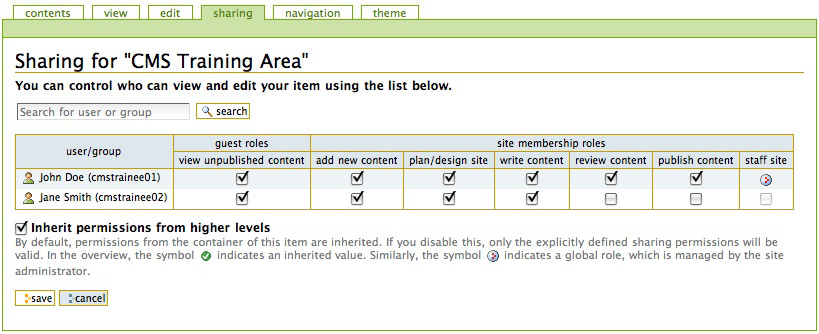
- You'll be brought to a page entitled Sharing for "Your Subsite Name", where you'll find a list of all users who currently have access to your subsite and the roles they have been assigned.
Note: If this is your first time accessing this page, you'll find that you only have the Staff Site role. You must assign any/all other roles to yourself manually.
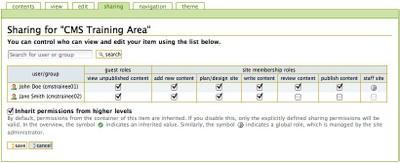
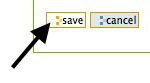
- To change the roles of a user already in the list, simply check or uncheck additional boxes in the user's row, then click Save.
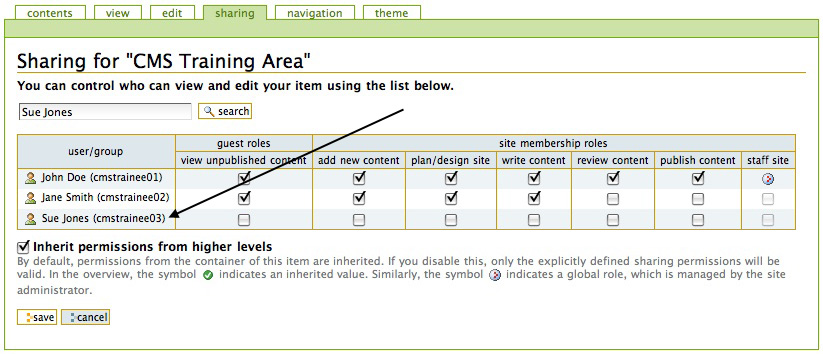
- To add a new user, type their first name, last name, full name or Hunter NetID in the search box and click Search.

- If this user's account has been activated for use in the WebCMS, his or her name will appear in the table.
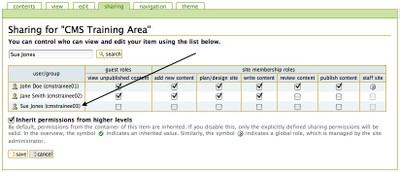
If this user's NetID has not been activated for use in the WebCMS, you must contact the Web Development Group and request that this user be given access. - You may now assign roles to the new user by checking the appropriate boxes in their row.

- When you are finished, remember to click Save.
- When the page reloads, the following notice will appear:

- You may now repeat steps 5-9 to add additional new users, if need be.