

How do I create a photo gallery?
The Hunter WebCMS allows you to create a photo gallery as a way to display several images on a single page.
You can include as many images as you'd like in your gallery, but only 12 images will be displayed per page.
Click here to view an example of a photo gallery.
To create a new photo gallery:
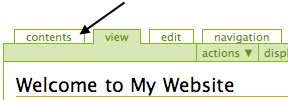
- From your subsite's homepage, click on the Contents tab.
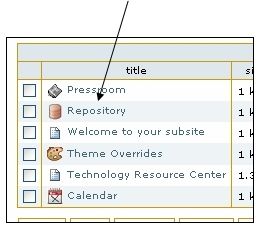
- Click on Repository.
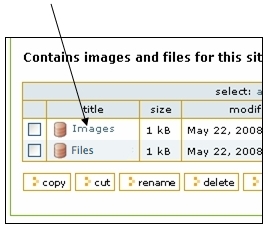
- Click on Images.
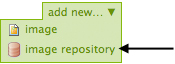
- In the green toolbar, click on Add New..., then select Image Repository. This new repository will serve as your gallery.
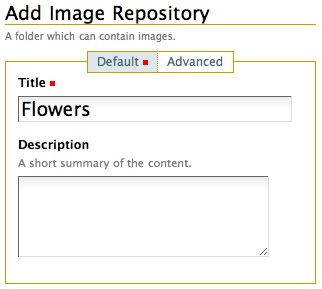
- On the Add Image Repository screen, enter a title and description (optional) for your gallery.
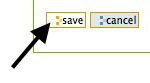
- Click Save.
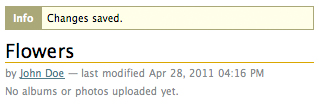
- When the page reloads, you should see the name of your gallery at the top of the page, along with a "Changes Saved" notice and a line of text saying, "No albums or photos uploaded yet."
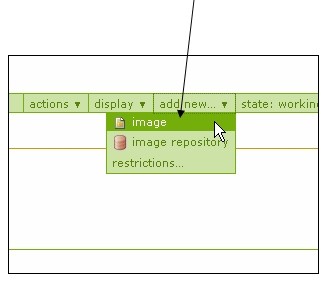
- You can now begin uploading images into your new gallery by clicking on Add New..., then selecting Image in the green toolbar.
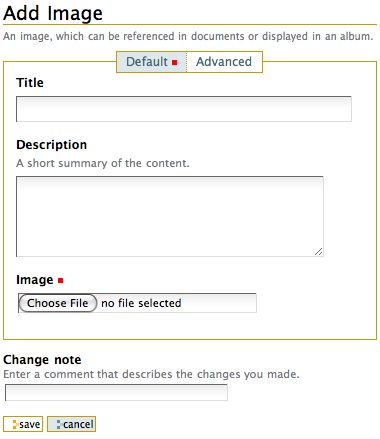
- On the Add Image screen, enter a title and description (optional) for your image, then choose the image you'd like to upload from your computer. When you're finished, click Save.
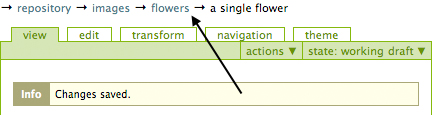
Additional instructions for uploading images can be found here. - When the page reloads, you'll be able to view your image and the image's title. Click on the name of your gallery in the breadcrumb trail to return to your new image repository.
- Repeat steps 8 - 10 to upload additional images into your gallery.
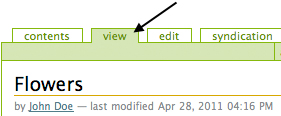
- After all images have been uploaded, you should be in the View tab of your image repository.
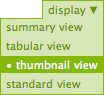
- In the green toolbar, click on Display, then select Thumbnail View. This will cause the image repository to display as a photo gallery on your public-facing website.
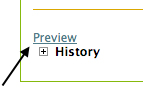
- You can click on Preview at the bottom of the page to see what your photo gallery will look like.
- Now that your photo gallery is set up, you can add an alias to the location in your subsite where you would like the gallery to appear, or use a superlink to add a link to the gallery to your site's navigation menu.
Note: When using an alias to display a photo gallery in a different location, the pagination at the bottom of the page will not work properly. Therefore, use of an alias is only recommended for galleries with 12 or fewer images.