
How do I create a new alias?
An alias is a tool used to display content in more than one place within the WebCMS. Essentially, an alias mirrors the content of a page, so that the same information appears in two separate places. Using aliases, content editors can avoid retyping existing content. Aliases can prevent end-users from jumping back and forth between different websites or folders; this decreases confusion and improves usability.
To be more specific, an alias is an object in a folder and is assigned a target object (such as a page). The alias makes the target object appear to be in the alias's folder (while the target object still exists in its original location).
An alias should be used when you want to 'pull' a page from another part of the WebCMS and make it appear to be part of your subsite. But be careful - an alias does not grant you any editing capabilities, so the contents of an alias cannot be changed unless the target object is changed. Also, aliases only mirror the explicit content of the target object, so clicking on links within the alias may take you away from your current location.
Example: A department has two pages - Graduate Advisor Office Hours and Undergraduate Advisor Office Hours. These pages are in a folder called Office Hours. If the department has two other folders called Graduate and Undergraduate, aliases could be used to make the Graduate Advisor Office Hours page appear in the Graduate folder, and the Undergraduate Advisor Office Hours page appear in the Undergraduate folder. In this example, each page would appear twice on the same website, just in two different locations. If the office hours needed to be updated, only the pages in the Office Hours folder would be edited, and the changes would automatically appear on the aliased pages.
To create a new alias:
- Navigate to the location in your subsite where you want to create the
new alias. Click on the Contents tab to ensure that you're in a folder.
- In the green toolbar, select Add New..., then click on Alias.
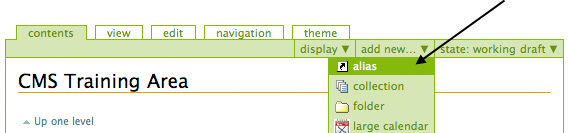
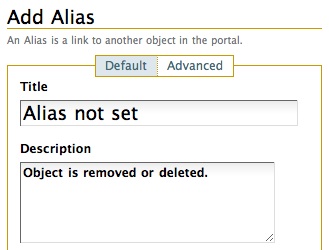
- You'll be brought to the Add Alias page.
- If you want the title and description of the aliased page to be different than the title and description of the target object, enter a new Title and Description here. Otherwise, you can leave it as is.
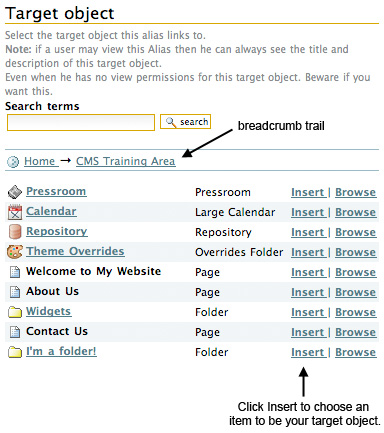
- The Target Object is the object that your alias will "mirror". Click on the Add button to open the Target Object window. In this new window, use the breadcrumb trail and the list of contents to navigate around
your site until you find the item you want to link to. When you've found
it, click on the Insert link to its right.

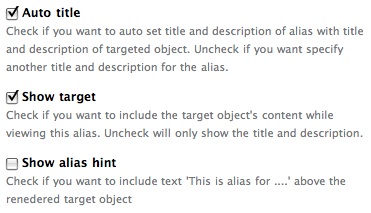
- Check or un-check the following options, depending on how you want to configure your alias.
Auto Title: Check this box to use the title and description of the target object as the title and description for your alias.
Show Target: Check this box to display the contents of the target object in the alias's location.
Show Alias Hint: Check this box if you want your site visitors to know that this is an alias.
When in doubt, check the first two and leave the third option un-checked.
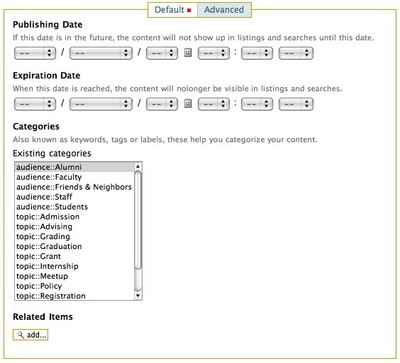
- For additional options, click on the Advanced button near the top of the page.

Here, you can set a publishing date (which determines when your alias will appear on the site) and expiration date (after which your alias will no longer be visible on your site), as well as categorize your content and add related items.
- When you're done, click Save at the bottom of the page.