
How do I create a new collection?
A collection is a special folder that displays the results of a defined search. The search criteria can be based on location, date, content type and body text, among other things. These special folders can search across the entire WebCMS, or you can limit the search to your particular subsite. Each time the collection is accessed, the search is re-run and current results are generated so that your content is always fresh and relevant.
Because collections look like folders once they're set up, you can change the way that the search results are displayed. Unlike regular folders however, collections can also contain body text like that on a regular page.
Creation and editing of collections is restricted to users with the Plan/Design Site role because it takes some knowledge and skill to set up.
To create a new collection:
- Navigate to the location in your subsite where you want to create the new collection. Click on the Contents tab to ensure that you're in a folder.
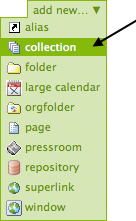
- In the green toolbar, select Add New..., then click on Collection.
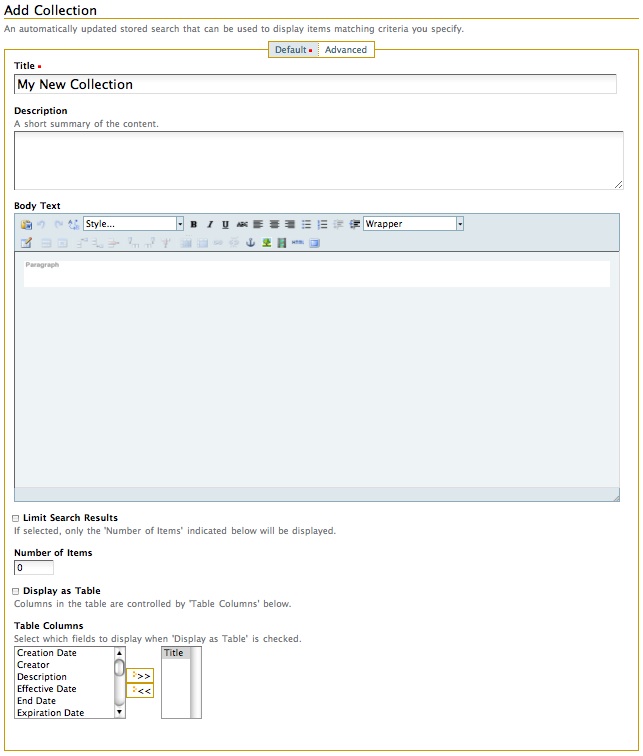
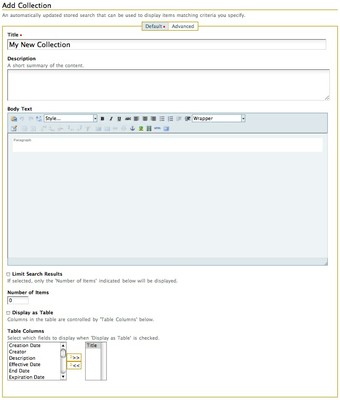
- On the Add Collection page, give your collection a title and description (optional). Any body text you enter on this page will appear above your search results on the live site. Here, you can also choose whether or not to limit your search results to a certain number of items, and you can choose whether or not to have your results displayed in a table (as opposed to a standard list).
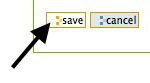
- When you're done, click Save.
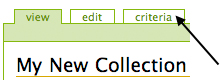
- When the page reloads, you'll be brought to the View tab of your new collection. The following notice should appear at the top of the page:

- Now click on the Criteria tab. You'll be brought to a page titled Criteria for (Your Collection's Name).
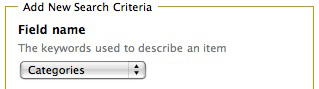
- You can now add as many criteria as you wish. Start by clicking on the Field Name drop-down menu and selecting an option.
You can choose from the following:
- Categories: the keywords used to describe an item
- Creation Date: the date and time an item was first created
- Creator: the user who first created the item
- Description: search within the description text
- Effective Date: the date and time an item becomes publicly available
- End Date: the end date and time of an event or seminar
- Expiration Date: the date and time an item is no longer publicly available
- Item Type: search only specific content types (pages, events, news items, etc.)
- Location: the folder or subsite where an item is located
- Modification Date: the date and time an item was last modified
- Priority: the priority of an announcement
- Related To: find items related to a given item
- Search Text: textual search of an item's content
- Short Name: search the URL (or web address) of an item
- Sortable Title: an item's title transformed for sorting
- Start Date: the start date and time of an event or seminar
- State: the workflow state of an item
- Title: text search of an item's title
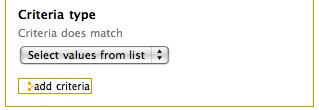
- Once you select a Field Name, the Criteria Type drop-down list will present you with new options based on the field type you chose. Select one of the criteria type options, then click Add Criteria.
- The Criteria for (Your Collection's Name) page will reload with a new table near the top of the page. This table lists all of your search criteria and the required details. Depending on which field you chose, the criterion details may vary.
For example, if we were looking for items located in a certain folder within our subsite, we would have selected Location as the field name and our table would look like this:
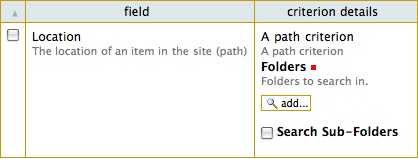
- In the Criterion Details column, make any selections necessary, type in required information or add items according to the field name you've chosen. Again, the options available to you will vary depending on your earlier selections.
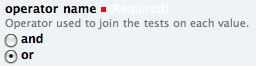
- In the Criterion Details column, you may see one or more Operator Name options. Select "and" if all criteria must apply to an item; select "or" if an item only needs to meet one of the criterion in order to be added to the collection.
- After making any changes in the Criterion Details column, click Save. To remove a field from the table, select the checkbox next to the field and click on the Remove button.

- You can continue to add additional criteria by selecting another Field Name and Criteria Type in the Add New Search Criteria box, then clicking on Add Criteria.
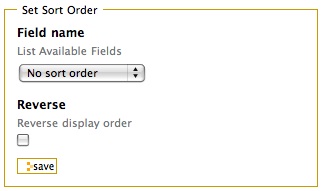
- You can choose how you want to sort your items by scrolling down to the Set Sort Order box. Here, you can choose which field name to sort by. After setting your sort order, remember to click Save.
- At any time, you can view all of the items in your collection (the results of your search criteria) by clicking on the View tab.